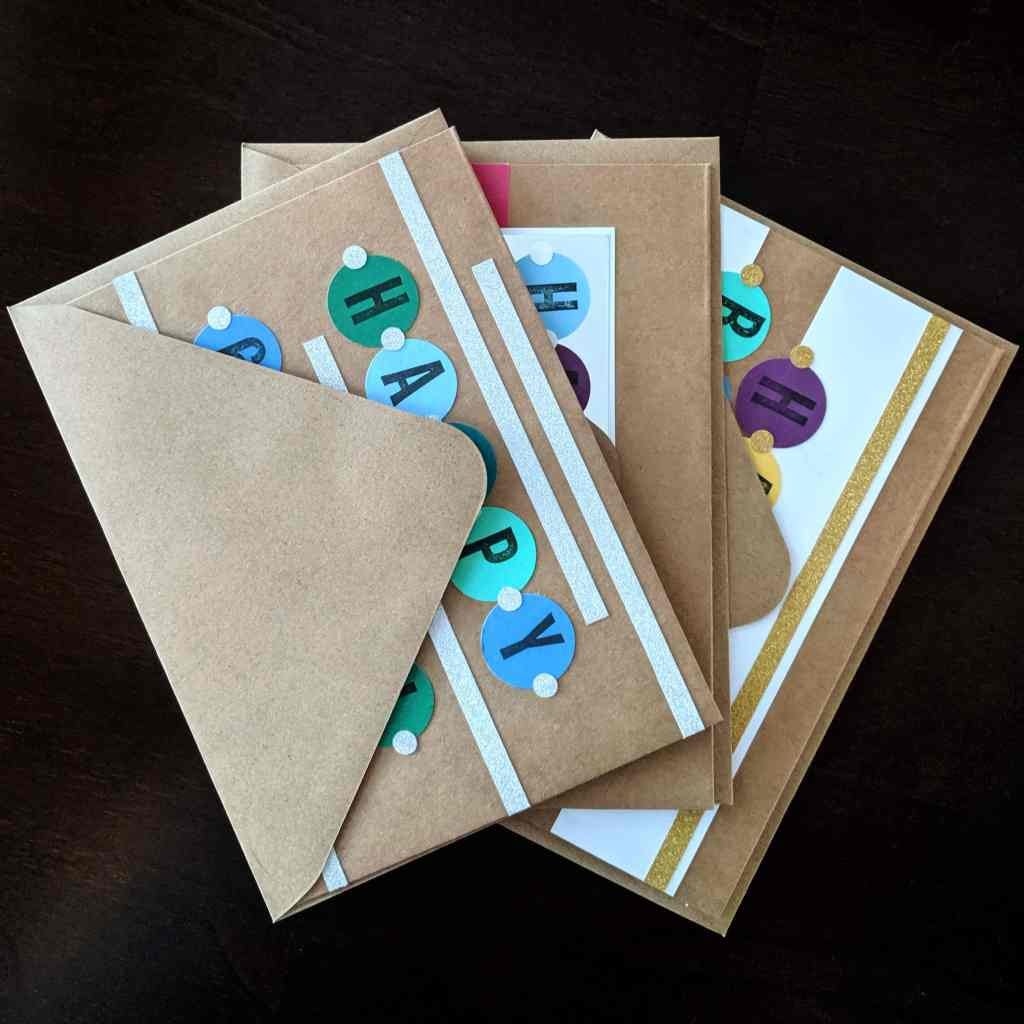
Super-Simple Stamped Birthday Cards Tutorial
Three easy ways to make birthday cards using just a few papers, letter stamps, and a 1-inch circle punch.
This article was originally published on a WordPress blog that I’ve retired in favor of Substack. Thanks for reading!
I have quite a few Geminis in my life, which means June is a big month for birthday cards. Luckily, cardmaking is one of my favorite paper crafts. This year, I whipped up a few cards using a new circle punch, alphabet stamps, and colorful paper in a variety of layouts. Today I’m sharing an easy step-by-step tutorial so you can create your own stamped birthday cards.
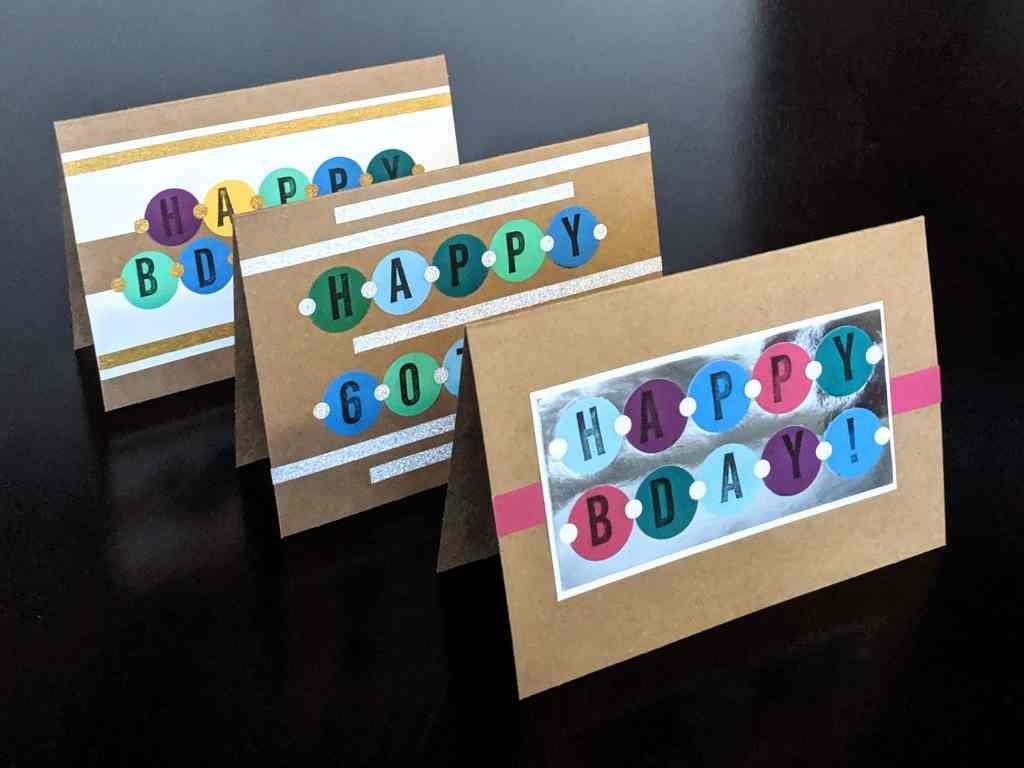
Pick any of these three designs or create your own using this super-simple method!
What you'll need
1-inch circle punch
3-hole punch or handheld 1/16-inch hole punch (one from the office will do)
Paper trimmer
Blank card(s) and envelope(s)
Alphabet stamps
Craft glue stick
Black archival ink pad
Colorful cardstock
Metallic foil or glitter cardstock
1. Punch out 10 large circles
I was on the lookout for a good circle punch since I love crafting with circles but I hate cutting them out by hand! I recently picked up a Fiskars 1-inch circle squeeze punch which I used for this project. Using that one or a similar tool, punch out 10 large circles for each card. You’ll use 5 for the top row and 5 for the bottom row.
I went with alternating colors but a monochromatic look would be great too. Or you could try a gradient effect, a neutral color scheme, lightly patterned paper… there are so many possibilities!
2. Punch out 12 small circles
Use a handheld single-hole punch or a 3-hole punch from your office supply stash to make small circles measuring 1/16 inches in diameter. Punch out 12 small circles for each card. You’ll need 6 for the top row and 6 for the bottom row.
Choose an accent color for this, or try glittery paper like I did. The glitter adds an extra dash of celebratory flair to the design to make these cards feel really special.
3. Stamp letters onto the large circles
If you’re using alternating colors, lay out the circles in front of you so you know which order they should go in. Then use large alphabet stamps and a black ink pad to spell out your message.
“HAPPY BDAY!” works perfectly since each row has 5 characters. Including a 2-digit age works just as well – I went with “HAPPY 60TH!” for a family member who’s celebrating this milestone this year. Feel free to mix it up and use more or fewer circles for each line if you want to say something else. Just make sure they’ll fit across the width of your card.
4. Cut out stripes & rectangles as accents
Use a paper trimmer to cut out cardstock or scrapbooking paper in a variety of shapes and sizes. Play around with different layouts and design ideas to frame your birthday message. I’ve done three different variations here:
Variation 1 involves thin stripes of glittery silver paper. I think this design has a funky, mid-century feel to it which I really like. To try this, just cut out 5 thin strips of the same length and width. Line them up with alternate sides of the card when you go to glue them in place.
Variation 2 has thick stripes spanning the width of the card. I layered a thin gold stripe over a thicker white stripe. For this design, cut out 2 thick pieces for the bottom layer and 2 thin stripes for the accent. You’ll glue each accent stripe along the edge of the thick stripes.
Variation 3 involves mounting the circles on a large rectangle. Cut 1 rectangle out of an accent paper. It should be just big enough for your circles to fit within. Then cut another that’s slightly larger. You’ll layer the smaller one over the larger one to get a framed effect. I chose mirror foil for the top rectangle and plain white for the bottom one.
You can also cut and layer a narrow stripe in a third color across the width of the card, as I did with the pink stripe.
5. Glue the paper onto the blank card
Once you’ve chosen your layout and cut out all the paper, use a glue stick to paste down the stripes and rectangles onto your card.
Start with the background layers and rectangles first. Then glue on the large letter-stamped circles. Lay them next to each other so the edges are just touching. I prefer how the rows of circles look when they’re neatly aligned, as with Variations 1 and 3, but I also offset them in Variation 2.
Finally, paste the small circles down where each circle meets. Place one more on each end of the row of letters to finish off your card.
Bonus tip: Make a few cards at a time
When I’m making greeting cards, I like to come up with a system and finish at least 3 to 5 cards at a time. (Especially if they’re as easy as these stamped birthday cards!)
Sometimes I like to come up with one great design and replicate it on a small stack of cards. I’ve done this for holiday cards in the past. But for more personal occasions, it can be fun to play around with different variations on the same general idea, as I did here with these stamped birthday cards.
Don’t be afraid to experiment to see what works best for you. In no time, you’ll have a stack of beautiful handmade cards ready to write and send out to your loved ones!


